

Finding Your remote_job_id in Workday
Every Workday position has a unique identifier that PastaHR uses to match incoming applications to the right job requisition. For Workday, this is the Workday ID found in the requisition’s integration settings.1
Open the job requisition in Workday
Navigate to the job requisition you want to use.
2
Go to Integration IDs
Inside the requisition, click Integration IDs then View IDs.
3
Copy the Workday ID
The Workday ID displayed here is the value to use as
remote_job_id in your PastaHR application link.remote_job_id parameter in your PastaHR application link, or set it as the default ID in your flow settings. For full details on how remote_job_id works, see Application Links.
Adding JobFit Score to the Candidate Overview
You can display the JobFit score and all factors directly in Workday’s candidate overview, so recruiters can compare candidates at a glance without switching between systems.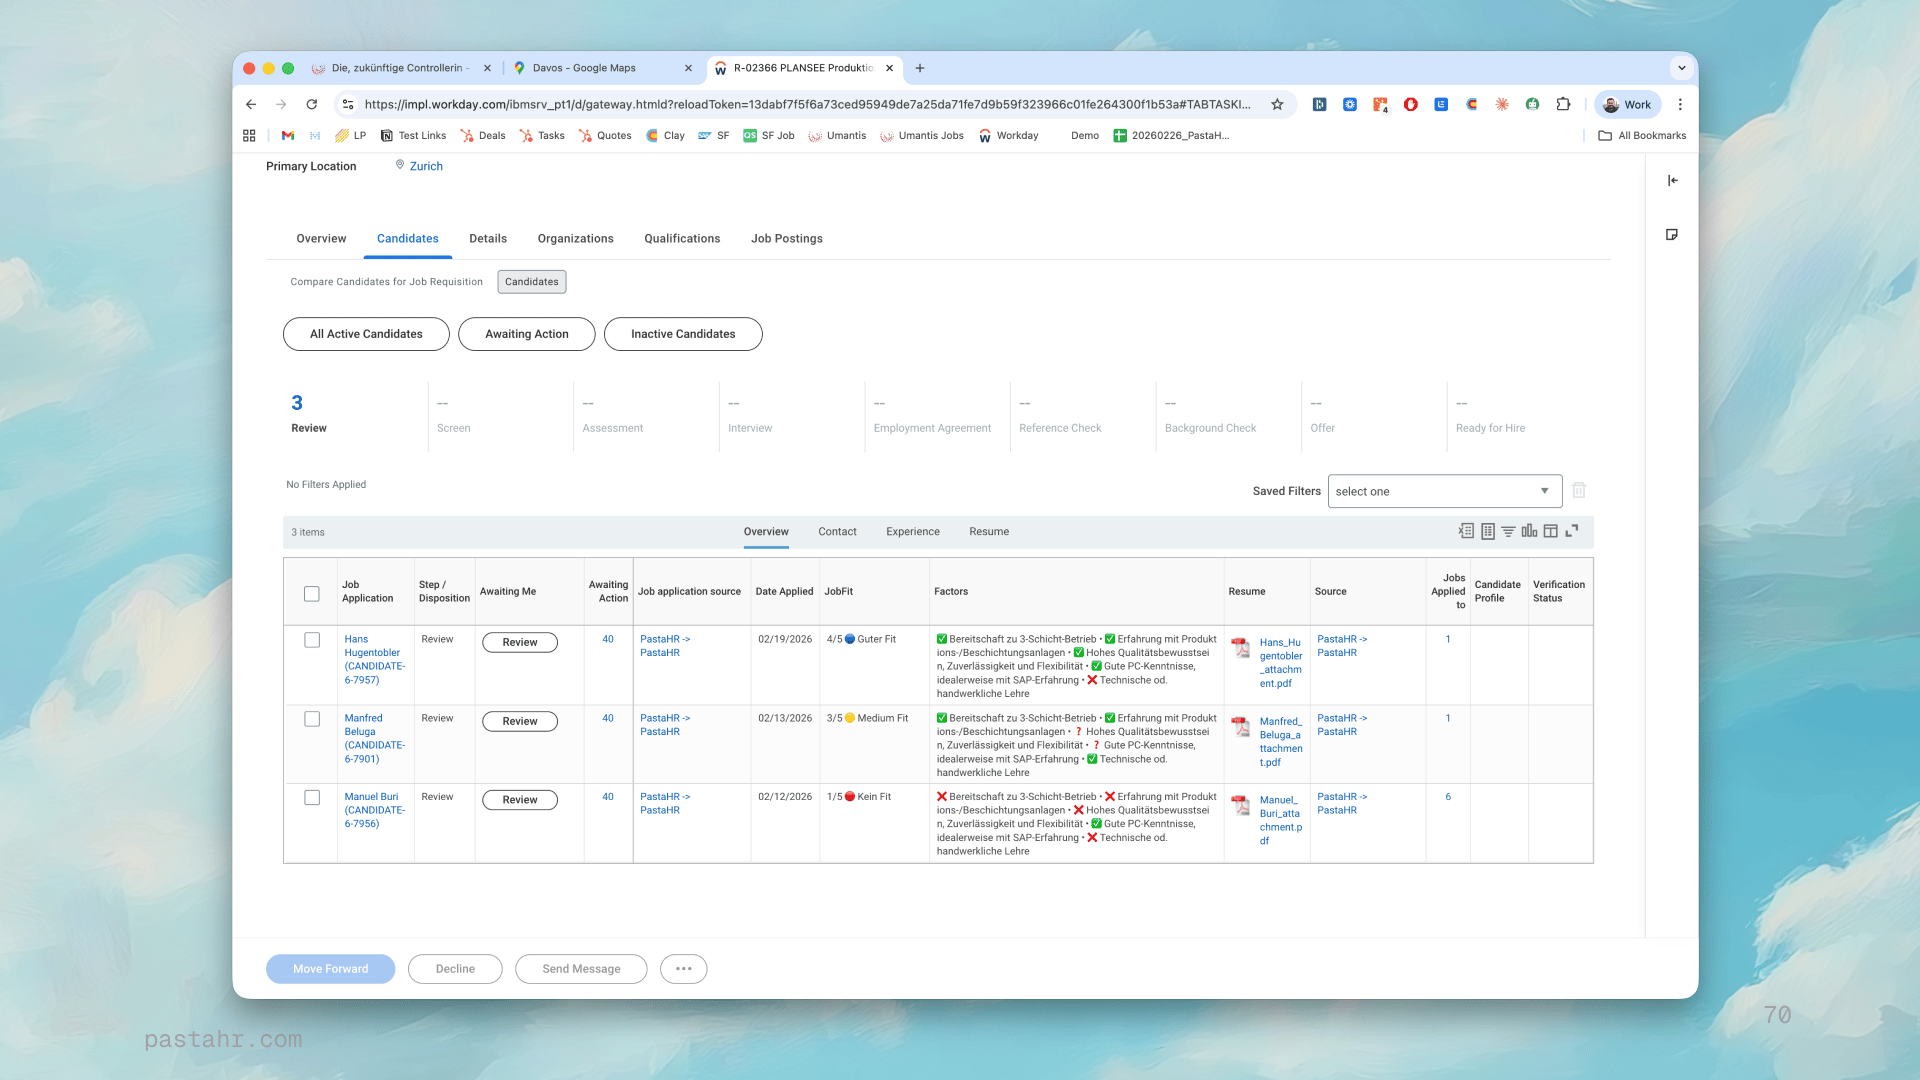
1
Open Edit Grid Configuration
In Workday’s search bar, type Edit Grid Configuration and select it from the results.
2
Select the Default Candidate List Grid
If prompted to choose a grid, select Default Candidate List Grid and press OK.
3
Add a Grouped Column in the Overview Section
In the grid editor, locate the Overview section. Click the + icon on an existing row to add a new Grouped Column.
4
Configure the New Column
Set the following values for the newly added row:
5
Displaying JobFit Factors
Repeat the previous step and also add the field for the JobFit factors if you’d like those displayed as well.
6
Save and Verify
Save the grid configuration. Return to the candidate list view for an active requisition and confirm the JobFit column appears and is populated for candidates who applied through PastaHR.
7
Inform PastaHR
Let PastaHR know the details of the custom objects you created, so the fields get populated automatically on applications.
The integration can be customised to your Workday instance and preferences. Contact support@pastahr.com for more details.